
Images have become as much an integral part of web content as the words of an article themselves. A clever image selection can enhance a reader’s understanding of your content or provide context for content that cannot be achieved quickly with words alone.
Images are a great way to let your reader know of the message of your article even before they have read your headline or content.
In your WordPress, you will typically use two main types of images: content and featured. Follow the steps below.
Embedding Content Images in WordPress
Using the Default Editor
Step 1: Open Your WordPress Editor
Log in to your WordPress dashboard.
Click Posts on the left-hand menu.
Select Add New to create a new post or click on an existing post to edit.
Step 2: Insert an Image
Place your cursor where you want the image to appear in your post.
Click the + (Add Block) button.
Select the Image block.
Step 3: Choose an Image Source
You have three options for adding an image:
Click Upload to select an image from your computer.
Choose an image from your Media Library.
Insert from URL by pasting the URL of an image hosted online.
Step 4: Adjust Image Settings
Once inserted, you can:
Resize the image by dragging its edges.
Align it (left, center, right), add a caption below the image and link the image to a webpage (if needed) using the toolbar.
Set Alt Text (important for accessibility and SEO) in the block settings.
Using Elementor
Follow these steps to insert an image in Elementor.
Step 1: Open Elementor Editor
Log in to your WordPress dashboard.
Navigate to Pages or Posts and select the one you want to edit.
Click Edit with Elementor to open the Elementor editor.
Step 2: Add an Image Widget
In the Elementor panel, search for Image Widget.
Drag and drop the Image Widget onto your desired section of the page.
Step 3: Upload or Select an Image
Click the Choose Image option in the Content tab.
You can:
Upload an image from your computer.
Select an image from your Media Library.
Paste the URL of an image hosted online.
Step 4: Adjust Image Settings
Once your image is inserted, customize it using the following options:
Size: Choose from thumbnail, full size, or custom dimensions.
Alignment: Set the image alignment (left, center, right).
Caption: Add a caption (None, Attachment Caption, or Custom Caption).
Link: Make the image clickable by linking it to a media file or a custom URL.
Hover Effects: Apply effects like opacity changes or animations.
Step 5: Save and Publish
Click Update to save your changes.
Using Classic Editor
The Classic Editor in WordPress provides a simple way to insert images into your posts and pages. Follow these steps to add images using the Classic Editor.
Step 1: Open the Classic Editor
Log in to your WordPress dashboard.
Navigate to Posts or Pages and select Add New (or edit an existing post/page).
Step 2: Place Your Cursor
Click inside the text editor where you want the image to appear.
If you want the image to be inline with text, place the cursor within a paragraph.
If you want the image to stand alone, place the cursor on a blank line.
Step 3: Click the “Add Media” Button
Above the text editor, click the Add Media button.
This will open the Media Uploader.
Step 4: Upload or Select an Image
Choose one of the following options:
Upload Files: Click Upload Files and select an image from your computer.
Media Library: Select an image that has already been uploaded to your WordPress site.
Click on the image you want to insert.
Step 5: Configure Image Settings
In the Attachment Details panel, you can:
Add a Title, Caption, Alt Text, and Description.
Choose Alignment (Left, Center, Right, or None).
Select Link To (None, Media File, or Custom URL).
Adjust the Size (Thumbnail, Medium, Large, or Full Size).
Once configured, click Insert into Post.
Step 6: Adjust Image Placement
If needed, click on the image in the editor to reveal formatting options.
Use the alignment buttons to adjust placement.
Resize the image by dragging its corners.
Step 7: Save and Publish
Click Save Draft if you’re still editing.
Click Publish to make the post live.
Setting a Featured Image
When you publish content in WordPress, it’s common to designate a “featured” image. This image typically serves as the thumbnail in article listings, appears as the first image in the article, and is often used for sharing your content on social media.
Setting a Featured Image Using the Default Editor
Step 1: Locate the Featured Image Option
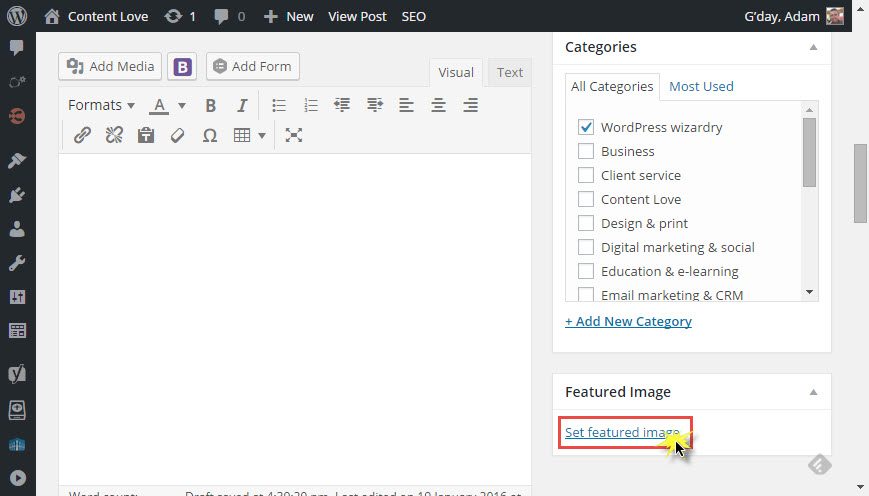
In the post editor, look at the right sidebar and find the Featured Image section.
Step 2: Upload or Choose a Featured Image
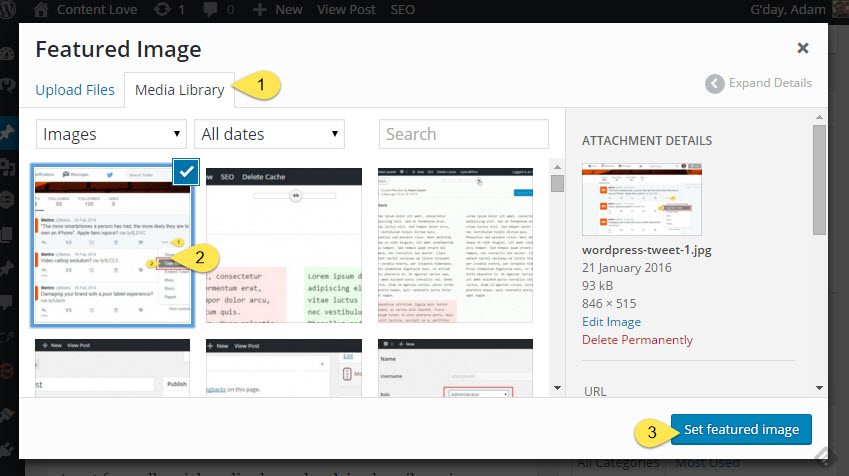
Click Set Featured Image.
Choose an image from your Media Library, or upload a new one.
Click Set Featured Image to confirm.
Step 3: Preview and Publish
Preview your post to ensure the featured image displays correctly.
Click Publish to make the post live.
Setting a Featured Image in Elementor
Setting a Featured Image in Classic Editor
Step 1: Open or create a Post
Navigate to Posts or Pages and select Add New (or edit an existing post/page).
Step 2: Locate the Featured Image Section
Step 3: Set the Featured Image
Click Set Featured Image.
Choose an image from your Media Library, or upload a new one.
Click Set Featured Image to confirm your selection.
 Step 4:Save and Publish